[Tutorial] How to make a procedurally generated map
Most of the Content Pack Editor elements are intuitive, but there is one element that is not: the map generator. Due to the nature itself of the used procedurally generated map algorithm: the Perlin noise algorithm. Some of your feedbacks confirmed that the map generator system is hard and obstructive. So I decided to make this tutorial to help you customize or create map generators.
A little bit of background
First of all, I think it is important to understand the basics of the used algorithm: the Perlin noise algorithm. Don't worry, no math here, just a general understanding.
This algorithm was initially created to generate realistic texture images. As it's name says, it generates a "noise" to a space (a two-dimensionnal space for our purpose), this noise has the property to looks smooth and natural, and can be randomized using a seed number (and the same seed will always generate the same result, so maps can be shared only using the seed number), perfect to generate a game map! Here's an example of an image generated with this algorithm:
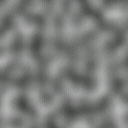
Each pixels has a value between 0 and 1, represented here with a gray gradient color. Now, imagine that this value is not just a color, but the height, the altitude of the ground of the map and ta-da! You have mountains and reefs! Add the sea level at an arbitrary level, for example 0.3, now you have oceans, lakes. The noise map used this way is called a heightmap for reasons. But a heightmap can be used for anything you want, for example, a moisture level, and can be combined to create complex maps. So if we combine our height heightmap with a moisture heightmap, we can have desert, jungle, swamp etc.
These examples were not taken randomly, the map of the Vanilla content pack uses a "height" heightmap, a "moisture" heightmap, plus a "special" heightmap for exotic biomes and rivers.
As a sum up, to generate a procedurally generated map, we use the Perlin noise algorithm, that will produce heightmaps, a 2D grid of randomized value between 0 and 1, varying "smoothly" on the space. We will use one heightmap, or combine many, to discriminate the space and so determine each tile and structure of the map.
Now we have solid basics, let's jump into the editor.
The map generator element
Let's have a look to the map generator element, with the Vanilla's default map generator as an example. It is composed of 3 different tabs.
The Heightmap tab
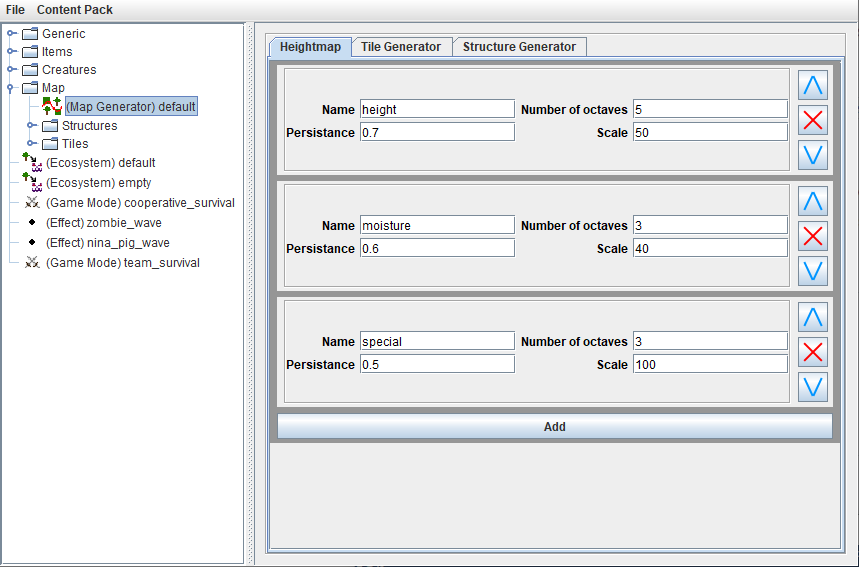
This tab is the place to start. In this tab, you can create any number of heightmap that you will use in the two other tabs to generate tiles and structures. A heightmap has four properties:
- Name: the name of the heightmap, used to reference the heightmap in the two other tabs.
- Number of octaves: the number of octaves used for the noise function. Each octave is a layer of variation twice bigger than the previous one. So the more octave there is, the larger the variations will be. With only one octave, there will be only small variations, only small islands of extreme values (0 or 1) with a shape close to a circle. With too many octaves (e.g. 200) the result will almost always be 0.5 (the middle of 0 and 1).
- Persistence: the persistence used for the noise function. A smaller value will smooth and slow down variations, A bigger value will speed up variations. As an extreme, a value of zero will produce a heightmap of 0.5 everywhere, and a very large value (e.g. 200) will causes the result to always be close to 0 or close to 1, with almost no variations between.
- Scale: the scale applied to the heightmap. if you double the scale, the shape of the result will be the same, but twice bigger.
These values are very experimental, Different combinations can lead to drastically different results. I recommends to make small modifications and see what happens.
Now, let's have a look to the next tab.
The Tile generator tab
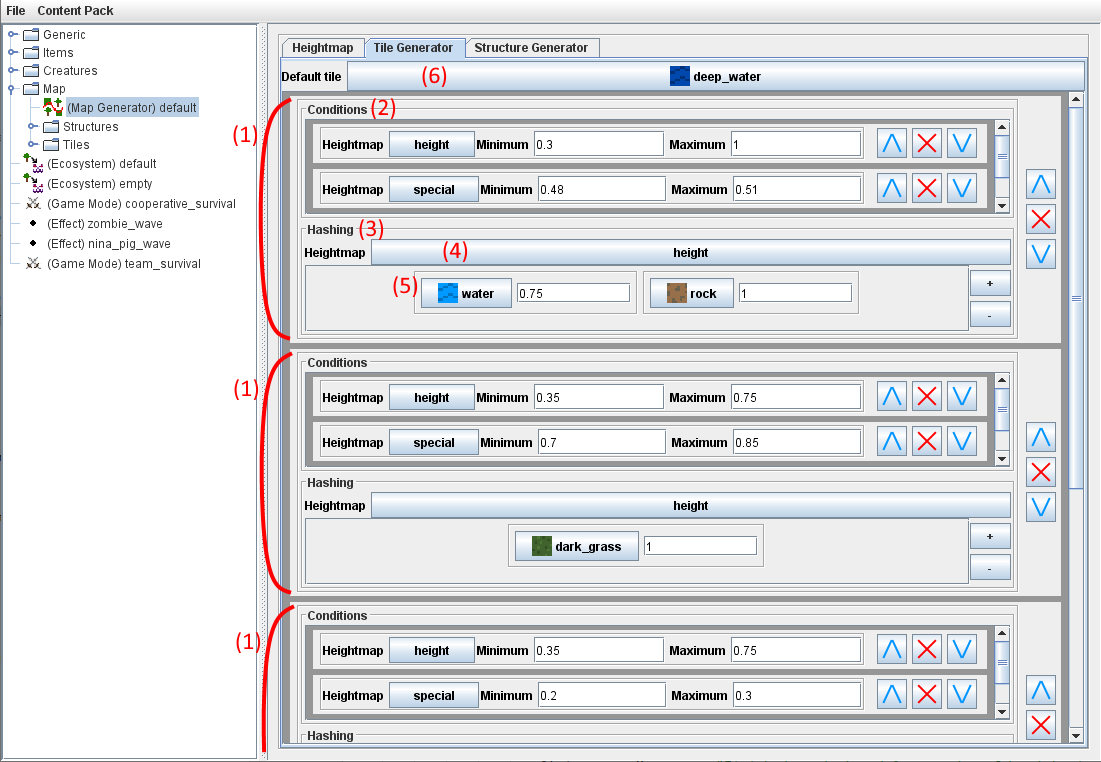
This tab will use the previously defined heightmaps to generate tiles. In this tab, you can edit a list of tile generator block (1), each tile generator block has a Conditions part (2) and a Hashing part (3).
When a portion of the map is generated, the engine will process tile by tile. For a given Tile, it will compute the value of each heightmap for this tile's position, and test with those values the conditions of each tile generator block defined in this tab, from top to bottom, until a condition group is matching.
Once it finds a condition group that match the heightmaps values, it will apply the hashing part to finally determine the tile to put. For that, The hashing part defines a heightmap (4), its value will determine the tile to put according to the hashing list (5), the first tile of this list is chosen if the value is between 0 and the associated value, the second tile is chosen if the value is between the previous one and the actual one, and so on.
A default tile (6) must be defined in case there is no matching conditions. It is also used as a default tile when a portion of map is still loading.
Let's take an example, considering this default map generator. For a given tile, if the value of the heightmap "height" is between 0.3 and 1, and the value of the heightmap "special" is between 0.48 and 0.51, it will choose the first tile generator block and use its hashing part. This hashing part says that if the heightmap "height" is between 0 and 0.75, the tile "water" is chosen, if the value is between 0.75 and 1, the tile "rock" is chosen.
Because of the top to bottom priority of the tile generator blocks, the ones at the top are generally specific cases, while the last one is the general case, the "default" case, and has no conditions. The first block of the default map generator above, used in the previous example, will produce rivers and canyons. And the last block:

will produce most of the map, has no condition because it's the last and most generic block. It will use the "height" heightmap to produce oceans and beaches at low value, grass at middle value and mountains at high value.
The tile generator blocks between the first and the last one will produce the exotic biomes (magic forest and graveyard).
Note that the river production uses a small range of the "special" heightmap centered to the middle value (0.5), while exotic biomes use a larger range at more extreme values (closer to 0 for one and closer to 1 for the other). This is not arbitrary, in practice, the more the range is small and centered to the middle, the more the result will looks like "rivers". On the over hand, the more the range is large and centered to extreme values, the more the result will looks like islands or reefs.
The "special" heightmap is used for both river and exotic biomes generation. This is mainly to optimize performance (the more heightmap there is, the more costly the generation of the map is), but we could perfectly imagine using two different heightmaps for these purposes. Because of this use of the special heightmap, the river generation will never pass through exotic biomes.
Let's go to the last tab, it is pretty similar to this one.
The Structure generator tab
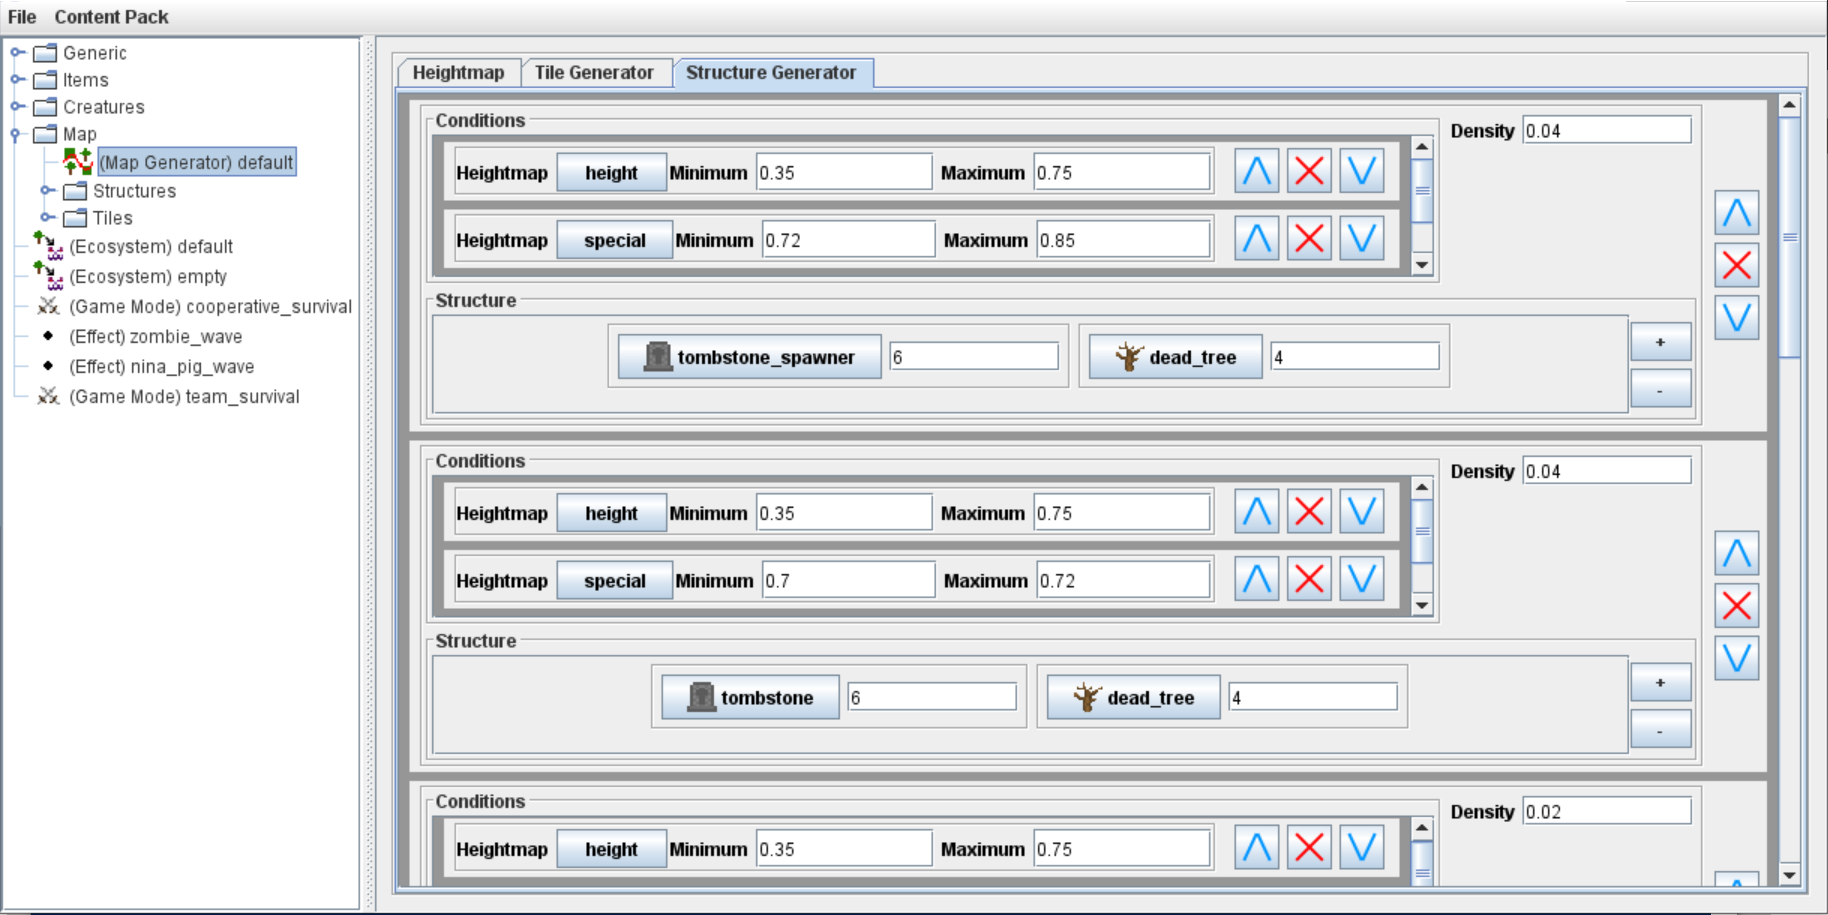
In the same way as the Tile generator tab, You can define here a list of structure generator blocks. The conditions part behave the exact same way. The block selection is processed the same way, from top to bottom until conditions match.
But this time the purpose is to put structures on top of some generated tiles, for that, each block has a "density" value, at the top right, this density is the probability for a tile to have a structure, so with a density of 0, there will be no structure, with a density of 1, there will be a structure on top of all tiles.
Below the Conditions part, the "Structure" part looks like the previous Hashing part, but works differently. This time, the associated value of each structure is the "relative probability weight" of this structure to be chosen. For example, in the first block above, the tombstone_spawner structure has 60% chance to be chosen ( 6 / (6 + 4) ), and the dead_tree structure has 40% chance ( 4 / (6+4) ).
Let's build map generators!
Now you have everything on hand to create your own map generator, or customize the default one. If for example, you want to add new biomes to the default map generator, you could add a new heightmap and use it, or use a mixed condition with the existing special and moisture heightmap, or find your own way!
If you have any questions, suggestions, please tell me in the comment section!
Leave a comment
Log in with itch.io to leave a comment.